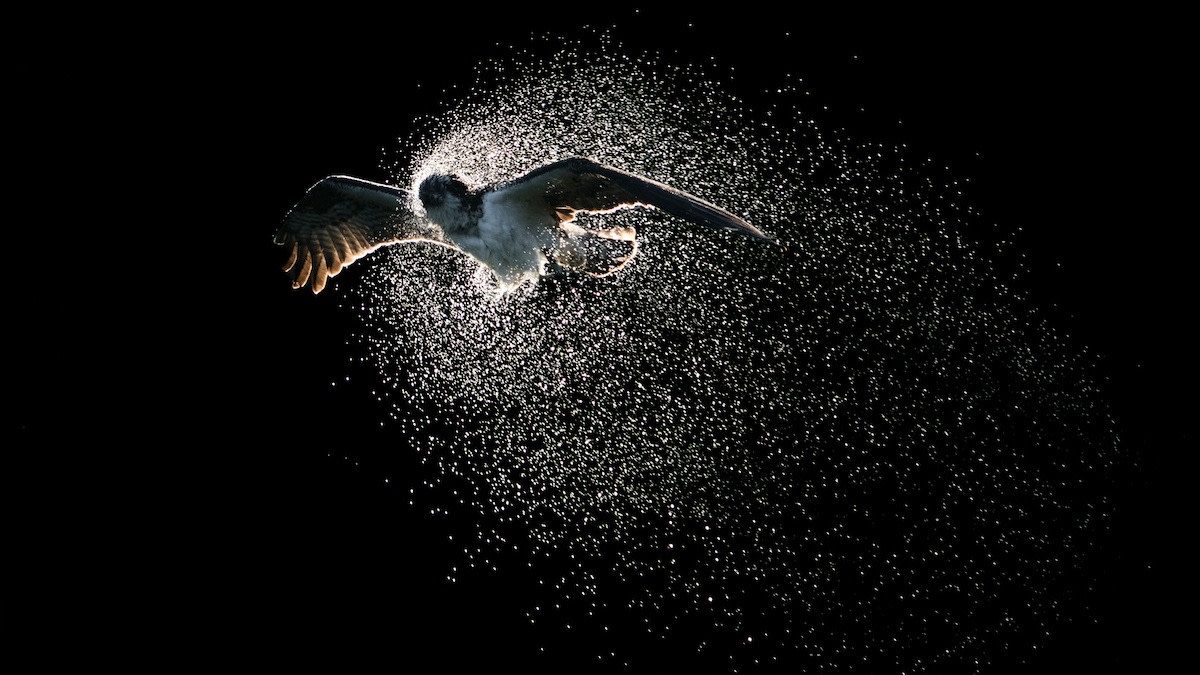
What Is Backlighting in Photography? 8 Easy Tips for Shooting the Perfect Backlit Photographs
Written by MasterClass
Last updated: Aug 30, 2021 • 4 min read
Backlighting in photography is a way for photographers to create dramatic lighting, either in a studio setting (for things like portrait photography) or when shooting outdoors. Learning backlit photography techniques can help improve your photography dramatically.
Learn From the Best
What Is Backlighting in Photography?
Backlight in photography involves positioning the main light source for a photograph behind the primary subject.
Backlighting is a popular technique among skilled photographers, but it can also present unique challenges for exposure and composition. Amateur photographers should take the time to learn backlight photography and expect a fair amount of trial and error on their first few attempts. Once you’ve learned the skill, you’ll find yourself using it again and again to produce striking, dramatically-lit images.
What Are the Effects of Backlighting in Photography?
Backlighting can be a very effective tool if used skillfully. If backlighting is employed well, it can bring a greater sense of depth and an emotional aesthetic to photographs.
Backlighting a photograph is not the simplest method of lighting in photography, nor is it right for every photograph. The first step to mastering backlight photography is understanding the effects that backlighting has on an image. The primary effects of backlighting include:
- Depth. Backlight photography emphasizes the depth behind the subject and gives images a greater sense of place.
- Dramatic effect. Backlighting can produce a dramatic contrast between the subject and the background. This can be an especially effective technique when shooting outdoor portraits.
- Good use of natural light. If you’re shooting outside with a small amount of natural light, backlighting can be a good way to take advantage of your lighting situation to produce a striking and evocative image.
8 Tips to Achieve Great Backlit Photographs
Follow these tips to improve your backlighting techniques.
- 1. Choose the correct camera settings. The first step to taking a backlit photo is switching to manual mode on your camera. Cameras are calibrated for straightforward, front-lit photography and often have trouble autofocusing and adjusting settings for backlight. Taking a good backlit photo often requires you to slightly overexpose the image, as the front side of your subject will be darker than the area immediately surrounding them. A good place to start is with a wide aperture (anywhere from f/2.8 to f/5.6) and an ISO of around 100 with a shutter speed somewhere between 1/100 and 1/640. Once you’ve taken some test photos, adjust your settings to achieve the look you are going for. Learn more about shutter speed in our comprehensive guide here.
- 2. Choose the right time of day. Backlighting works best either early in the morning or late in the afternoon, as the sun is rising or setting. These times of day are known as the golden hour because the sun is positioned low in the sky and serves as a soft natural light source. If you shoot closer to midday, the sun will be positioned directly above your subject, dispersing light evenly and making it much harder to concentrate the light behind your subject.
- 3. Position the light behind your subject. Choose a camera position where the light source is directly behind your subject. When you look through your camera, the light should spill past the sides of your backlit subject, but the central source of light should be mostly hidden.
- 4. Adjust your equipment. Once you’ve taken some test images, you can adjust your equipment and positioning. If using the sun as you backlight, strong sun rays behind your subject will often create unwanted sun flare. Using a lens hood or a photography umbrella kit can help to combat an overpowering lens flare.
- 5. Experiment with different angles and positions. Move around and experiment with different positions to shoot from. You never know which angles you’ll end up liking best. You’ll want to give yourself a couple of different photo sets to choose from when selecting your final photos after a photo shoot.
- 6. Fill flash and fill light. For backlit portraits, using a fill flash can help add additional light to your subject’s face. This way you’ll still achieve the intended effect of dramatic backlight but still provide enough clarity on the face to produce a usable portrait.
- 7. Use a spot meter. Spot metering focuses the camera on a particular area of your frame and allows you to determine the best exposure for that area. Professional photographers use spot metering when backlighting because standard exposure readings often underexpose the subject when taking a backlit photograph.
- 8. Adjust the white balance. Learning how to properly set the white balance on your camera is key to producing good backlit images. Getting the right white balance will make the colors in your image as vibrant and lifelike as possible, which is difficult when shooting with a strong light source behind your main subject.
Whether you’re just starting out or have dreams of going professional, photography requires plenty of practice and a healthy dose of patience. No one knows this better than legendary photographer Annie Leibovitz, who has spent decades mastering her craft. In her first online class, Annie reveals how she works to tell a story through her images. She also provides insight into how photographers should develop concepts, work with subjects, shoot with natural light, and bring images to life in post-production.
Want to become a better photographer? The MasterClass Annual Membership provides exclusive video lessons from master photographers, including Annie Leibovitz and Jimmy Chin.
