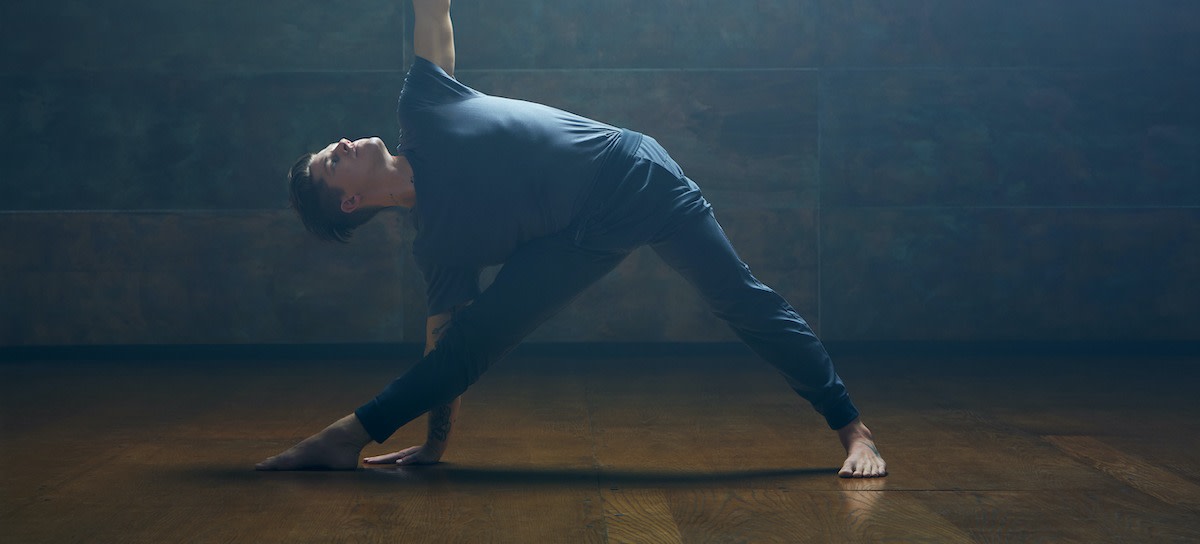
How to Do Triangle Pose: 5 Benefits of Triangle Pose
Written by MasterClass
Last updated: Jun 7, 2021 • 4 min read
Triangle pose is a yoga pose that is great for either beginner or more advanced yogis, and can benefit both your physical and mental health.
Learn From the Best
What Is Triangle Pose?
The triangle pose, also called Trikonasana (“trikona” is a Sanskrit word for “triangle,” while “asana” means “pose”), is a foundational standing pose in yoga that strengthens and lengthens the hamstrings and groin while also opening the shoulders and stretching the hips. The foundational posture is named for the triangle shape your body makes during the move.
5 Benefits of Triangle Pose
Like many yoga poses, the triangle pose carries a few benefits for your body and mind, such as:
- 1. Increases stability. The triangle pose activates your core muscles, which aids in balance and stability.
- 2. Stretches and lengthens the spine. This pose can reduce stiffness in the spine and back, resulting in increased flexibility.
- 3. Opens the hips and shoulders. The triangle pose unlocks the hip flexors and shoulders, increasing mobility and reducing injury risk.
- 4. Stimulates your organs. Trikonasana activates your core, which can stimulate your digestive organs, potentially improving your metabolism.
- 5. Reduces stress. The triangle pose can target the lower back, which is where some people carry their stress. This pose can help release that tension, resulting in reduced anxiety and a more stable emotional state.
How to Do Triangle Pose
Despite its simple appearance, there are a few key steps to follow when performing this yoga pose: 
1. Position your body. Starting in the mountain pose (or Tadasana), move your feet a little wider than shoulder-width apart, and extend your arms, so they’re parallel to the ground with your palms facing down. If you’re starting on the right side, the right foot should be at a 90-degree angle with the end of the mat, with your left foot at a 45-degree angle.
2. Bend to the side. Take a deep breath, then exhale as you bend your body at the hip joint, extending to the side over the right leg (if you’re starting on the right). Keep the sides of your waist long, not scrunched. Lengthen your tailbone towards your back heel.
3. Reach with your arms. As you reach your right arm down to your right foot, gently grab your ankle with your right hand. At the same, your left arm should be extending upwards, with the fingers of your left hand pointed towards the ceiling, forming a straight, vertical line with your arms and shoulders.
4. Hold and repeat. With your shoulders aligned, turn your head and look up to the ceiling. Briefly hold, then return to the starting position and repeat with the left leg.
3 Tips for Performing Triangle Pose
Before performing any new exercise, consult your doctor to determine if it’s right for you. The triangle pose may seem simple, but it can be less effective when performed incorrectly. To successfully execute a triangle pose, check out the following tips:
- 1. Keep your legs straight. If you’re reaching towards your foot but can’t quite get there, avoid bending your knee, which can make the pose less effective. If knee-bending continues to be an issue, place a yoga block beside your extended leg to use for leverage. Learn about yoga props in our complete guide.
- 2. Avoid bending your back. The triangle pose is not a forward bend but a sideways movement at the hips performed with straight arms and legs. Avoid bending your back and rounding your spine while performing a triangle pose. Your body should form the shape of the letter “I” rather than “C.”
- 3. Engage your muscles. While this pose may seem simple to execute, it does require the active engagement of your core and thighs to be effective. As you sink into the foundation pose, keep those muscles tightened to receive all of the benefits.
How to Modify Triangle Pose
If you’re looking to change up your triangle pose, there are a few modifications you can make, such as:
- Extended triangle pose (Utthita Trikonasana). The extended triangle pose requires nearly the same setup and execution as the regular triangle pose, except the stance is wider to open the pelvis, and the hand placement varies slightly. For instance, if you’re reaching your left foot with your left hand, grab your big toe or place your lower hand flat on the ground beside the foot, rather than stopping at the shin or ankle.
- Revolved triangle pose (Parivrtta Trikonasana). Start in the same setup position as a standard or extended triangle pose, with your arms parallel to the floor. Pivot towards your front leg with your chest open, without bending your left nor right knee. Depending on which side you’re starting with, you’ll either extend your left arm towards your right ankle or right arm towards your left ankle, with your free hand planted at your hip. Bend forward towards your front heel until you can grab your ankle, then slowly pivot your torso to face the direction of the leg you’re holding, gently twisting your body until you can comfortably look up.
How to Do Yoga Safely and Avoid Injury
Proper form and technique are essential to ensure the safety and effectiveness of a yoga practice. If you have a previous or pre-existing health condition, consult your physician before practicing yoga. Yoga poses may be modified based on your individual needs.
Ready to Learn More About Yoga?
Unroll your mat, get a MasterClass Annual Membership, and get your om on with Donna Farhi, one of the most celebrated figures in the world of yoga. Follow along as she teaches you the importance of breathing and finding your center as well as how to build a strong foundational practice that will restore your body and mind.
