Swale Definition: 5 Benefits of Drainage Swales in Landscaping
Written by MasterClass
Last updated: Nov 30, 2021 • 4 min read
Homeowners make use of swales to control the flow of water in their backyards and other exterior regions of their property. No matter what the specific land use, these drainage systems are natural and self-sustaining and can come with a litany of benefits.
Learn From the Best
What Is a Swale?
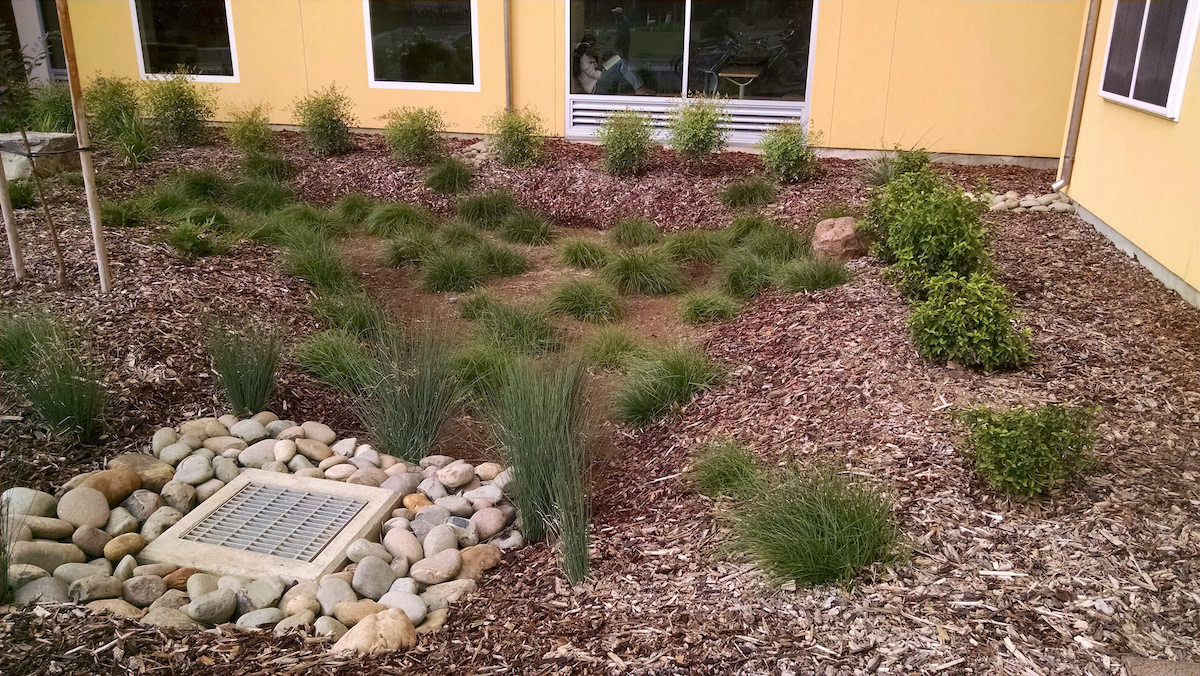
Drainage swales are shallow ditches that blend in with surrounding landscape design, facilitate water management, and encourage natural irrigation. Swales take advantage of natural slopes in the land to direct water downward into all the soil as opposed to letting it pool above ground or waterlog a specific region. Property owners can make use of these self-sufficient, permaculture storm drains, particularly if they live in wetland areas.
5 Benefits of a Swale
For a simple divot in the ground, a swale comes with a multitude of positives. Benefits of swales include:
- 1. Directing water: When heavy rain falls, water runoff velocities can approach great intensities and speeds. Swales allow you to direct the water downward into soil that needs it, rather than letting it pool all around or outright flood other areas of your front and back yards.
- 2. Encouraging filtration: Swales facilitate pollutant removal by encouraging moisture to move around naturally rather than allowing it to stagnate in one place. This helps remove sediment and other solids, boosting water quality. This way, once the water from your yard reaches larger sewer outcroppings (or culverts), you can rest assured you did your best to help the overall environmental quality of your community.
- 3. Preventing clogging: Excess water combined with sediment and other pollutants can clog other sewer and drainage pipes in and around your house. This sort of compaction can cause all sorts of problems. Swales distribute water more equitably throughout your yard, using it to irrigate and infiltrate the soil rather than clog up your pipes.
- 4. Promoting infiltration and irrigation: A wet swale will soon mean irrigated plants and infiltrated soil. Encourage your soil to avoid unnecessary standing water retention above ground—allow your swales to distribute the water throughout all of the soil and, as a result, the newly seeding plants planted in it.
- 5. Reducing puddling: You can drain water with swales to get rid of puddles as an added bonus of stormwater management. A couple well-placed swales in your garden will mitigate or outright eliminate this unsightly surface water.
5 Steps to Building a DIY Swale
Building a makeshift swale can be easy. Here are the key steps:
- 1. Ascertain where to dig. Your swale should take advantage of the natural slopes of your yard if possible. These don’t have to be very steep at all—just an inch or two will do the trick. If you don’t see any areas that suggest themselves as side slopes for your swale, choose an area where you can dig a slanting divot in the ground that stretches out very gradually over ten or more feet. This shouldn’t look like a ditch but rather a gentle slope.
- 2. Build a berm. The sides of the swale are berms. These higher outcroppings above ground are what allow rainwater to slope downward into the swale itself and permeate the soil. Like the swale, berms shouldn’t be very noticeable, just a couple inches or so. Make sure to locate them in an area where people won’t trip over them. Alternatively, designate them with decorations and organic matter that visitors will intuitively step around.
- 3. Dig the swale. If your berms are near a naturally sloping area of your yard, you might not even have to dig a swale in the first place. Just allow them to naturally divert water into a stretching divot. Otherwise, start digging a gradual, wide-stretching divot over multiple feet. Slant it downward by an inch or so from one foot to the next.
- 4. Erect a check dam. Building a check dam for your swale is optional. If you plan to make a grass swale, simply cover it again with the same organic matter and grass you used in the rest of your yard. If you’d prefer a dry swale, use rocks to build a makeshift check dam inside the divot. This further helps you prevent a high water table underground that will saturate your plants with too much rainwater.
- 5. Plant around the swale. Now that you’ve built your swale, take advantage of how well it can irrigate your garden and infiltrate your soil. Boost your plants occasionally with mulch, water, and fertilizer, but rest in the knowledge that this self-sustaining permaculture mechanism will do plenty to keep your plants healthy.
3 Swale Alternatives
Swales are just one option for controlling stormwater runoff outdoors. Here are three alternatives to consider:
- 1. French drain: This low-lying perforated pipe rests under the soil to collect and send out excess groundwater to storm sewers and other output locations. French drains can be very helpful, and you can use these underdrains in conjunction with swales to adequately reallocate or drain water from your yard.
- 2. Gutters: This storm drain system starts collecting rainwater at the roof of your house before their downspouts distribute the water to the soil below. Many houses have built-in gutters upon completion of their construction.
- 3. Rain garden: Use water-hungry flowers to suck up the rain’s moisture as a supplement to or alternative to swales. Both rain gardens and swales use berms, and you can replace a check dam with a rain garden if you please.
Learn More
Grow your own garden with Ron Finley, the self-described "Gangster Gardener." Get the MasterClass Annual Membership and learn how to cultivate fresh herbs and vegetables, keep your house plants alive, and use compost to make your community—and the world—a better place.
