How to Stencil a Tile Floor: Steps for Using Floor Stencils
Written by MasterClass
Last updated: May 13, 2022 • 3 min read
Learn how floor paint and a stencil can refresh the functionality and aesthetic of your interior tile surfaces.

Learn From the Best
What Is a Stencil for a Tile Floor?
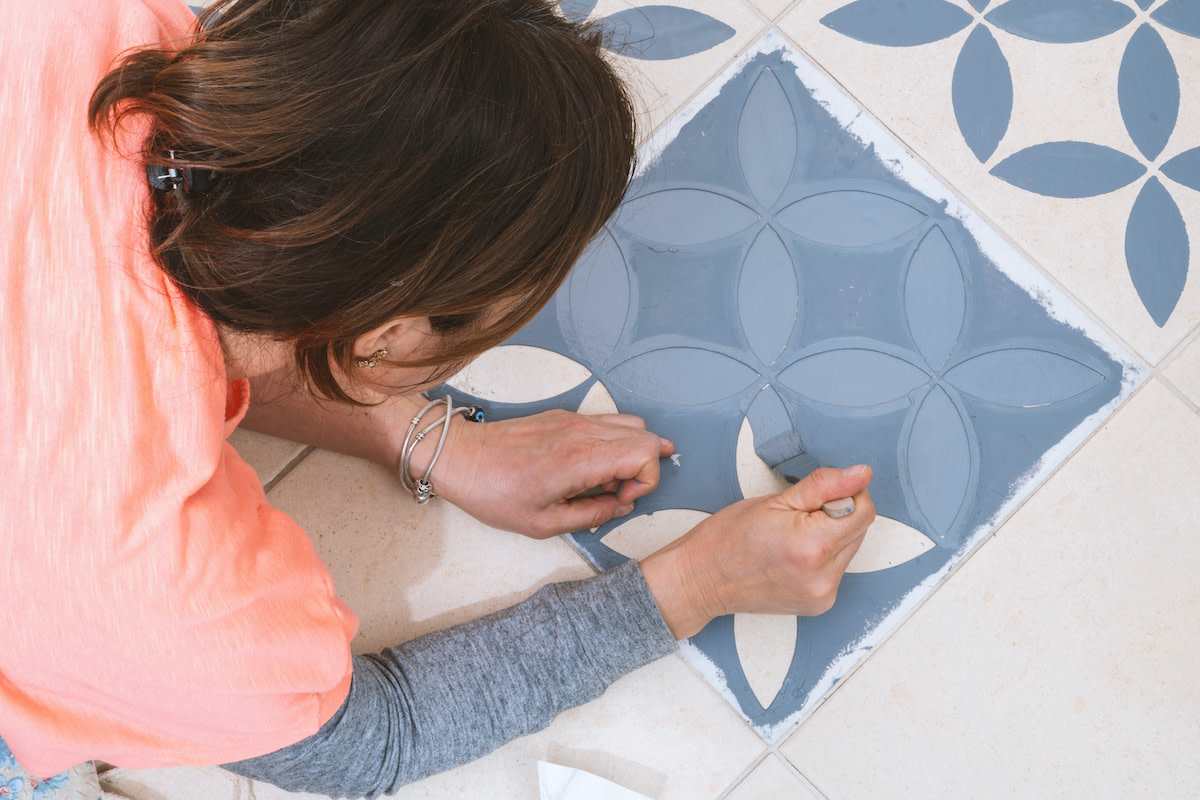
A tile stencil is a plastic template with negative space to accommodate paint designs and patterns. Floor tile stenciling can refresh the appearance of worn tiles in your home or add character to your interior design.
A painted tile floor provides the opportunity to accelerate a bathroom makeover, and it can cut costs on materials and labor. Instead of retiling an entire floor, you can quickly make your old tile look like new tile with a few cans of acrylic paint and some mylar stencils. Stencils are also eco-friendly and reusable, so you can save them for future crafts and DIY projects.
How to Stencil a Tile Floor
Follow this step-by-step tutorial to complete a DIY tile floor makeover:
- 1. Gather the necessary tools and materials. Like wall stencils, tile floor stenciling requires a few specialty tools and materials. You will likely own most essential tools if you are an avid home improvement DIYer; however, you should ensure your selected paints and tools complement your tile type. For instance, if you are sealing over a white tile or base coat, choose a polyacrylic sealant over polyurethane since the latter can leave a faint amber hue or discoloration.
- 2. Sand and wash the tile. Stone and cement tiles are typically rough enough and porous enough to allow for a primer to bind to it effectively without sanding. Glazed flooring materials, however, such as a high-gloss vinyl floor or ceramic tile, can benefit from sanding before a primer application to extend the life of the floor's surface. Use fine-grit sandpaper and an orbital sander to remove any glazing and lightly scuff the tile's surface. Then wash the tile with a moist sponge to remove any dust or debris. Refrain from sanding linoleum altogether, as it will ruin the product.
- 3. Protect your baseboards and grout lines. You can protect surrounding surfaces with paper, drop rags, or painter's tape. Some tile stencil design kits might also include grout stencils you can attach to the edges of your tiles. If your stencils do not come with these grout stencils, protect the grout lines by isolating the edge of each tile with painter's tape—similar to how you would save the countertops and adjacent wall paint near a backsplash.
- 4. Apply the primer and base coat. Create a smooth and uniform painting surface with a base coat of primer. Unless you are using a matte chalk paint, primer is essential when you paint high-traffic areas, such as the laundry room or bathroom tile. Lay down your background color or base coat, then allow at least a twenty-four-hour dry time to let the primer and each coat of paint cure. This process might require several applications if there is a drastic difference between the color of your tile and your base coat.
- 5. Stencil whole tiles first. Manufacturers produce tile stencils to standard tile dimensions. Optimize your project time by tackling whole tiles before working on partial tile sections around walls and fixtures. Utilize a foam roller or nap roller to cover large surfaces.
- 6. Paint a light first coat. Lightly coat the roller and remove any excess paint with a paper towel or paint tray to avoid paint bleeding around the edges of the stencil. Use a stencil brush around the corners of your pattern to craft sharp, accurate lines on a delicate design.
- 7. Cut the stencil to fit partial tiles. Measure and sketch complex angles on used stencil sheets and then cut them to the proper size. You will use the same stencil painting techniques as you did for whole tiles, but you might need to use additional painter's tape to ensure you’ve protected multiple angles and all the surfaces of a bathroom floor.
- 8. Touch up your mistakes. Use a detailed paintbrush to apply background and foreground paint colors if you need to fix areas where paint has bled through the stencil or surrounding painter's tape. You might need to redo your stencil with an additional topcoat if an area of the stencil pattern appears less vivid or defined than it does on nearby tiles.
Ready to Give Your Space a Chic Update?
Master everything from color theory to pattern mixing with the MasterClass Annual Membership and exclusive lessons from award-winning interior designers like Corey Damen Jenkins and Kelly Wearstler. From shopping for statement furniture to designing a lighting scheme to choosing the newest member of your plant family, the skills you’ll pick up are sure to make your house, apartment, or condo feel even more like a home.