Star Trails Guide: How to Photograph Star Trails
Written by MasterClass
Last updated: Aug 18, 2021 • 4 min read
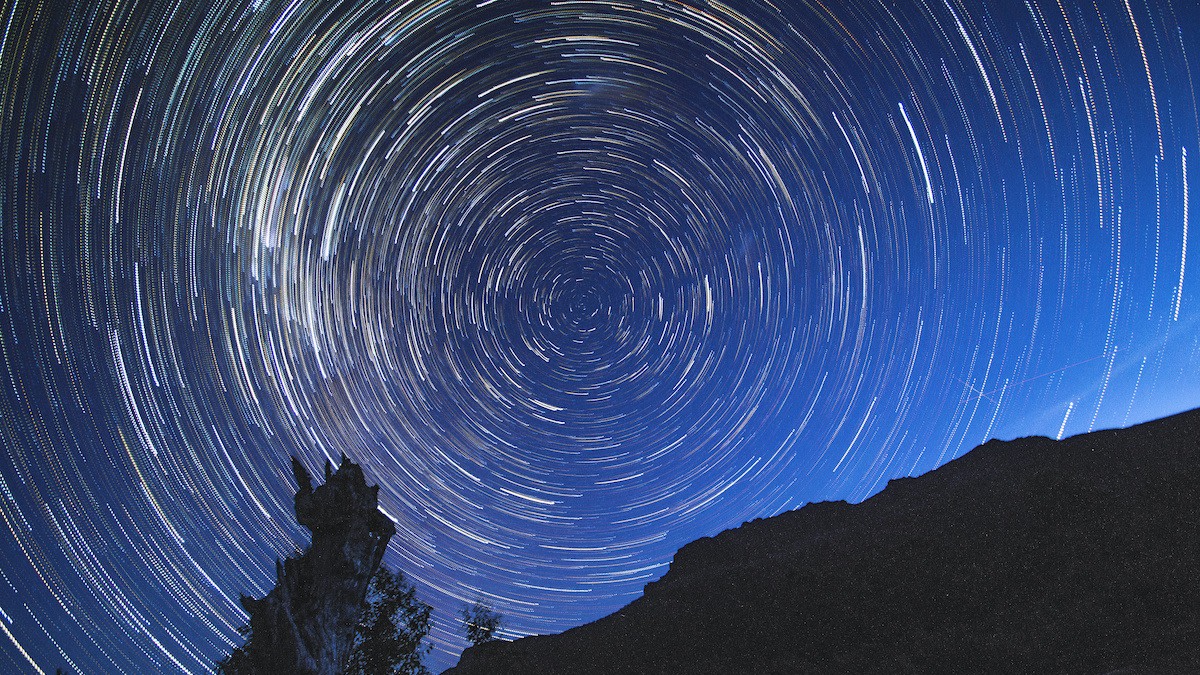
Star trails are a single long exposure shot of the night sky that makes the stars seem like streaks in the sky and helps to illuminate the Earth’s rotation.
Learn From the Best
What Is Star Trail Photography?
Star trail photography is a type of landscape photography that involves using a longer exposure against the night sky to capture the pattern of stars reflected by the Earth’s rotation. When done correctly, the final image looks like streaks of light, often formed in a circular pattern, depending on where you point the camera. If you are in the Northern hemisphere taking star trail photos, you can focus on Polaris to achieve this streaked effect. If you want a straight line of stars, rather than circular streaks, you can aim your camera to the east or west.
How to Photograph Star Trails
Photographing star trails involves a lot of patience as with many other kinds of astrophotography, like photographing the moon or the milky way. Still, the right gear, technique, and amount of time can yield breathtaking photos. This tutorial will help you learn how to best snap some pictures of our galaxy and beyond.
- 1. Choose the right location. Dark locations that are unimpeded by light pollution are best for star trail photography. While extra light sources can sometimes add ambiance to your photos, it’s best to pick a spot with as few obstacles as possible if you’re a beginner.
- 2. Check the weather. Cloudy, murky skies can affect your camera’s visibility of the stars, so you want to choose an evening that will have less cloud cover. Check the weather report to confirm clear skies before going out to shoot.
- 3. Check the moon phase. A moon that is too bright, such as a full moon or waxing gibbous, will make your photos too bright and impede the visibility of your star trails. A new moon or even a quarter moon is the ideal phase for shooting star trails in a dark sky.
- 4. Gather the right gear. Star trail photos require long exposure times, often as long as an hour, so you’ll need a sturdy tripod that you can place on a flat surface. Holding the camera yourself can increase the chance of camera shake and blurry photos, so you want to avoid shooting by hand. Extra batteries and memory cards can also be useful for longer shoots.
- 5. Find your place in the sky. Your star trail patterns will look different depending on where your camera is pointing in the sky. In the Northern Hemisphere, find Polaris (also known as the North Star) to determine the “center” of your trail. Use the south celestial pole if you’re in the Southern Hemisphere. Aiming at these areas will produce circular lines of light within your photos while pointing east or west will produce straighter star lines.
- 6. Pick the correct lens. Select a wide-angle lens such as a fisheye lens to help capture as much within the frame as possible. A wide-angle lens has a shorter focal length than a normal lens, which can be used to expand the horizontal scope of a camera shot.
- 7. Select your aperture (f-stop number). The smaller the aperture, the larger the depth of field and the sharper your images will appear. For star trails, an aperture of f/2.8 to f/5.6 is recommended. A narrower aperture will let in less light, but your stars will be less visible. A wider aperture allows your camera to use all your available light to set your subject in focus and shoot star trails.
- 8. Pick your ISO (sensor speed). ISO is a camera setting that determines your camera’s sensitivity to light. In terms of image quality, a low ISO value means your image will be darker and have less grain (or noise). A high ISO number means your image will be brighter and have more grain. For star trails, a recommended ISO is between 400 and 800.
- 9. Avoid autofocus. Manual mode is the best way to capture night photography because your camera will likely not be able to pick up enough light automatically. Manual focus lets you set your own adjustments to customize the amount of light available for your shot.
- 10. Set your exposure time. Your exposure time or shutter speed—the amount of time your sensor is exposed to light—should be long enough to capture your star trail shots. While this period of time can depend on a variety of factors such as light availability and lens length, 30-second exposures are an acceptable place to start. If you want to photograph a long star trail, you may need as much as an hour between exposures to create a striking time-lapse photo.
- 11. Try some test shots. To make sure your camera settings like white balance and aperture are suitable for photographing your environment, take a few test shots to see how your images come out. Test shots will also help you fine-tune the angle and direction of your photos.
Want to Learn More About Photography?
Become a better photographer with the MasterClass Annual Membership. Gain access to exclusive video lessons taught by the world’s best, including Jimmy Chin, Tyler Mitchell, Annie Leibovitz, and more.
