Root-Bound Plant Guide: How to Fix a Root-Bound Plant
Written by MasterClass
Last updated: Nov 10, 2021 • 3 min read
Whether you have an array of indoor container plants or you’ve bought some new plants from your local garden center, learning how to fix root-bound plants can help you maintain a thriving container garden.
Learn From the Best
What Are Root-Bound Plants?
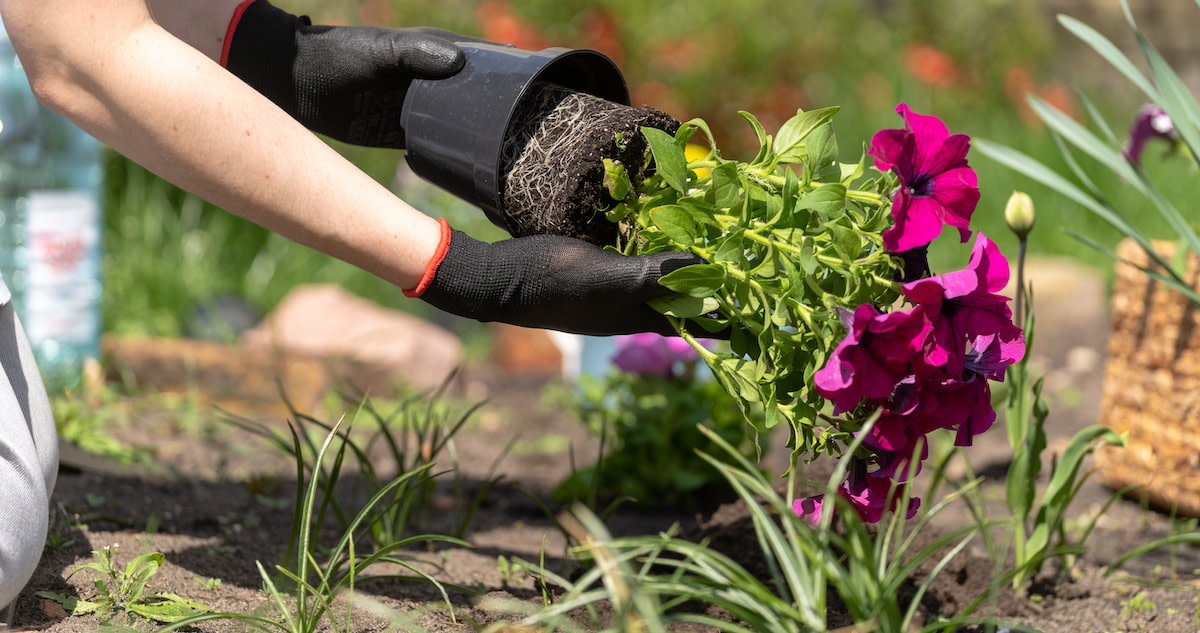
Root-bound plants, also referred to as pot-bound plants, are plants with roots that have grown too large for their containers. The roots of these potted plants will coil around the root ball, becoming so entangled that they cannot absorb nutrients from the soil, which can lead to starvation.
When you buy a new plant from a garden center, there’s a high probability that it is already root-bound. To promote healthy growth in these plants and help them survive, you’ll need to untangle their roots and plant them in a larger container.
How Do Plants Become Root-Bound?
Plants become root-bound because they are in containers that are too small to accommodate their roots. While any type of healthy plant with normal growing habits can become root-bound, it is most likely to happen with plants that have large, deep root systems. The gardening center or nursery may have also potted the plant in a too-small container.
4 Root-Bound Plant Symptoms
Root-bound plants exhibit various symptoms that will allow you to diagnose the condition without lifting the plant out of its pot. Here are some tell-tale signs that your plant may be root-bound:
- 1. Stunted growth: If your plant has stopped producing new growth, its roots probably do not have enough room to grow. Stunted growth is a clear sign of a root-bound plant that you need to repot.
- 2. Yellowing leaves: If your plant has yellowing or browning leaves and stems near the base of the plant, it may be root-bound. However, this symptom can also indicate underwatering, overwatering, or too much sun. If your plant has yellowing or brown leaves even though you’ve provided it with proper care, this may indicate that it is root-bound.
- 3. Distorted pot: If you have a severely root-bound plant, the shape of the pot that it’s in may become distorted or even crack. The roots may even creep out of the drainage holes in the grower container.
- 4. Visible roots: If your plant’s roots are breaking through the surface of your soil—or even creeping over the sides of the container—you can assume that your plant is root-bound.
How to Fix Root-Bound Plants
Follow these simple steps for fixing and transplanting your bound plants to make them healthy again:
- 1. Remove the plant from the pot. Dig up the plant from its original container. Hold the plant near the base of its stem and gently pull the plant out while holding the bottom of the container. If the plant is stuck, insert a sharp knife or small gardening trowel around the sides of the root ball to loosen it from its container.
- 2. Soak the roots. Once you’ve removed the plant from its small container, assess the condition of its roots. Gently shake the root ball of the plant to clear some of the dirt away. Soak the plant’s root ball overnight to loosen them up for detangling.
- 3. Untangle the roots. After you’ve soaked your plant’s roots, they should be pliable enough for you to untangle them with your hands.
- 4. Cut into the root ball. In severe cases, your plant’s roots may be too matted for you to untangle them by hand. In this case, use a knife to cut into the root ball, and use your fingers to dig into these incisions and free up the roots.
- 5. Prune the roots. Root pruning effectively prevents your plant from becoming root-bound again and promotes healthy new root growth. Use gardening shears or scissors to prune around the bottom of the root ball. After pruning, use a fork or your fingers to loosen the remaining roots before replanting your specimen.
- 6. Transplant into a larger pot. Now, you’re ready to re-pot your houseplant into its new pot. Choose a pot with drainage holes and ample space for the plant to grow. Your pot’s diameter should be at least one inch wider than the diameter of the plant’s root mass. If you're expecting your plant to grow quickly, use a pot up to four inches wider. Prepare your pot with fresh potting soil and plant the roots, so they are loose and spread out in the pot. Water the plant immediately after repotting it.
Learn More
Grow your own garden with Ron Finley, the self-described "Gangster Gardener." Get the MasterClass Annual Membership and learn how to cultivate fresh herbs and vegetables, keep your house plants alive, and use compost to make your community—and the world—a better place.
