Patch Pocket Instructions: How to Sew a Patch Pocket
Written by MasterClass
Last updated: Oct 26, 2022 • 3 min read
Patch pockets give articles of clothing a decorative, personal touch and a practical pouch. Learn how to sew a patch pocket using a few simple steps.

Learn From the Best
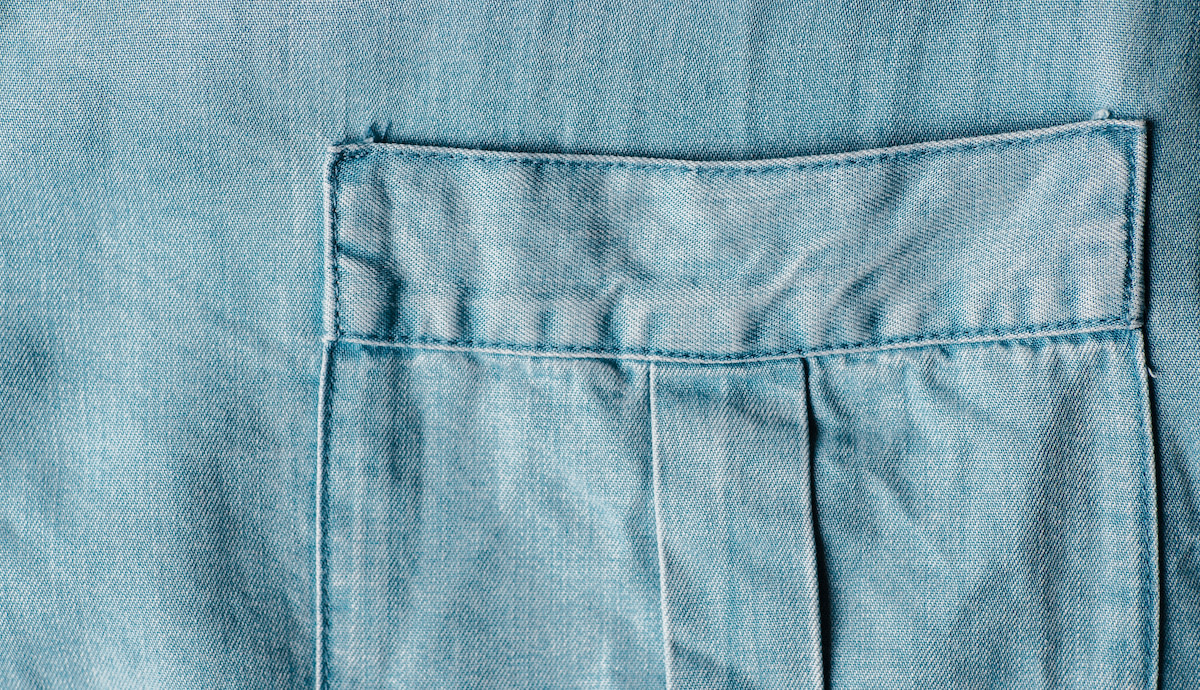
What Is a Patch Pocket?
A patch pocket is a sewn-on fabric piece with the top edge open to act as an additional pocket on a piece of clothing. There are different types of pocket sizes and patterns, allowing the sewer to individualize their jeans, jackets, blouses, dresses, and other articles of clothing. You can use your existing clothing as a template for what color and fabric to use, or you can get creative and add unique materials and fabric scraps that pop on your outfit.
How to Sew a Patch Pocket
To sew patch pockets correctly, gather your supplies: a sewing machine, iron, pins, and fabric scissors. Then follow these simple steps:
- 1. Create a sewing pattern. Use marking paper to cut a sewing pattern piece in the size and shape you want. You can make a square, rounded, or pointed pocket pattern. Be sure to include seam allowances in your design.
- 2. Assemble and cut your fabric. Choose the material you want, then measure it with a ruler, marking it in pencil or tailor’s chalk where you intend to cut. Use fabric scissors for a cleaner cut.
- 3. Serge the fabric. Set your sewing machine to the zigzag stitch setting, then serge the bottom edge and each side of the pocket to keep these edges from fraying. Leave the top of the fabric square as is.
- 4. Fold the serged edges. After sewing the three raw edges, fold them up a quarter inch onto the wrong side of the fabric (the side that will face the inside of the pocket). Press these sides down with an iron to create clean lines.
- 5. Create your top fold. Based on your desired pocket height, fold the top of the pocket over twice to the wrong side.
- 6. Sew this top fold. Sew closer to the edge to seal your top fold. You can select the edge stitching style and stitch length. Guide your stitching line carefully to create a parallel line to the top of the fold. Then press the top fold with an iron to secure this placement.
- 7. Pin your pocket into place. Decide where your patch should go and then pin your pocket with the right side facing outward. Keep the top edge of the pocket open.
- 8. Topstitch the pocket. With your pocket set, topstitch the pocket, starting with the top fold corner. Work your way around to sew each of the three sides (left, bottom, right), topstitching one-eighth inch from the fabric’s edge. To finish, backstitch and press the pocket with an iron.
4 Tips for Adding Patch Pockets
Following these quick tips, you can ensure a smooth process for sewing pockets:
- 1. Clean your fabric before sewing. If you wash and then tumble-dry your fabric, it will be easier to sew. Dry it until it is just a bit moist and then iron the fabric to make it more flexible.
- 2. Make a clean fold line. Carefully create your fold line to have a clear runway for sewing later. Once your fold lines are set, press them to secure them.
- 3. Use fusible interfacing. You can add a strip of fusible interfacing to the top of the pocket for more structure and reinforcement. Fusible interfacing is a thick material featuring a heat-activated adhesive.
- 4. Wash and snip. After sewing on the patch pocket, wash your clothing. If it can survive a wash and tumble, your patch should be more than secure for use. After the fabric is dry, snip off any frayed ends from the bottom corners or sides of the pocket.
Want to Learn More About Fashion Design?
Become a better fashion designer with the MasterClass Annual Membership. Gain access to exclusive video lessons taught by the world’s best, including Laura Kim and Fernando Garcia, Diane von Furstenberg, Marc Jacobs, Tan France, Anna Wintour, and more.