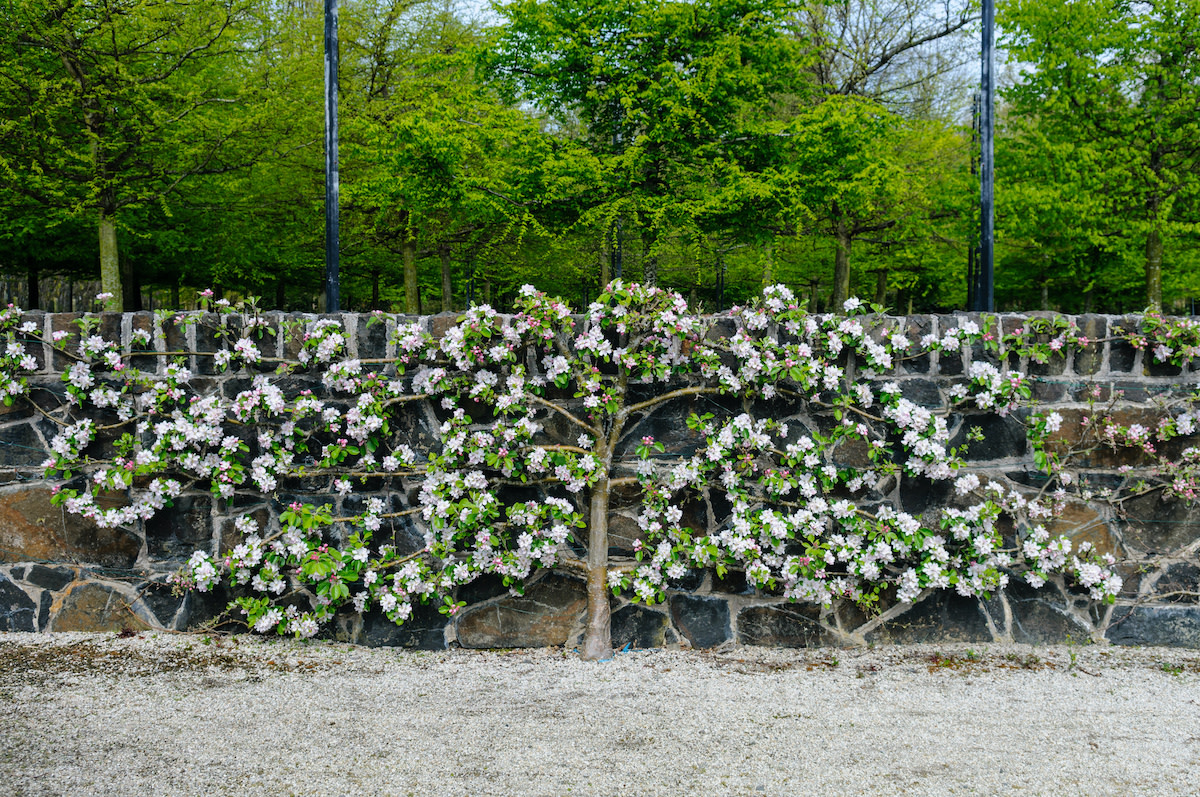
Guide to Espalier: How to Espalier Your Trees and Plants
Written by MasterClass
Last updated: Oct 21, 2021 • 4 min read
An espalier plant grows along a series of supports to fit a desired shape. Follow along with this guide to learn how to grow plants in this functional and stylish design.
Learn From the Best
What Is Espalier?
Espalier is the process of training woody trees and shrubs to grow on a two-dimensional flat plane, usually against a trellis, wall, or fence. This gardening technique is used to fit many fruit-bearing plants into small spaces, or to decorate walls with vining plants.The practice of espaliering trees dates back to the Middle Ages. The word espalier is a French word derived from the Italian spalliera, which means "something to rest your shoulder on."
To espalier a tree, gardeners prune excess branches off of a plant and tie young, pliable branches to supports so that they grow in the desired direction over a number of years. Fruit trees are particularly popular to espalier, like apple trees, pear trees, and crabapple plants, as this technique provides fruiting branches the good air circulation and sunlight exposure they need to produce plentiful fruit.
5 Types of Espalier
Here are some of the most popular designs for espalier plants.
- 1. Horizontal cordon: Horizontally cordoning espalier trees is the most traditional form of espalier. Gardeners train these trees to grow horizontal tiered branches, or "ropes," out from a single vertical trunk. Multi-tiered cordons are used when growing rows of fruit-bearing trees to increase their yield during the growing season.
- 2. Fan: Just as it sounds, a fan espalier plant has branches that grow out from its central trunk at a 45-degree angle, creating a fan shape.
- 3. Candelabra: In this espalier design, a series of branches extend horizontally from a central trunk on its lower tiers, then rise up at a ninety-degree angle to form the shape of a candelabra.
- 4. Belgian lattice: Also called Belgian fence, this espaliering technique trains a series of trees into V shapes and then connects them to form a lattice effect or a free-standing living fence.
- 5. Palmetto Verrier: Similar to the candelabra shape, Palmetto Verrier espaliering trains horizontal branches into a U shape by turning them up at the ends.
How to Train Espalier Plants
If you’re looking for a home gardening project that can liven up your small garden space, follow these simple steps for training your own espaliered trees. Keep in mind that espaliering takes a few years and a lot of patience to complete. However, the payoff for your years of pruning will be great.
- 1. Find your trellis or support. You will need a strong support structure for your espaliered tree. Find a trellis to attach to a blank wall in your garden, or choose a place against a strong fence. Make sure that your trellis has at least three evenly spaced horizontal tiers to support the lateral branches that will grow outwards from your tree’s central trunk.
- 2. Pick your plants. Decide on which plant you want to espalier. Espaliered fruit trees (like apple trees, pear trees, or flowering quince trees) are a popular option, but you can also espalier magnolia trees, camellias, yew trees, or any other woody plant or tree. Make sure to choose a young tree, because their branches are more pliable and easy to train. Dwarf trees are also easier to train.
- 3. Plant your tree. Dig a hole for your young tree against the trellis or fence you will tie your branches to. Make sure to plant your root system firmly and water your plant immediately. Allow at least eight inches of space between the wall and your tree if you choose to plant it against a wall.
- 4. Prune your tree. The first real stage in espaliering your tree is to prune the branches and trunk. Choose two even branches near the base of the plant's trunk that will act as your first level of horizontal cordons. Then prune back all the other branches. Depending on the shape you’re hoping to make, either prune the rest of the trunk down to primary cordon branches, or attach multiple tiers of your branches to your horizontal trellis supports.
- 5. Tie your branches to the support. Using galvanizing wire or plant ties, tie your branches and trunk to the trellis. Try to pull the branches as close to the trellis as you can to train them in the desired horizontal direction.
- 6. Continue to prune your tree over the years. As your tree matures, keep an eye on how it is growing and continue to prune away branches that are not growing against your trellis tiers. Use your desired espalier shape as you prune your branches.
- 7. Tie new growth. As your espalier begins to take shape, remember to continue to tie new branches back against the fence or trellis. Prune away any extra branches that don’t adhere to your espalier shape.
Learn More
Grow your own garden with Ron Finley, the self-described "Gangster Gardener." Get the MasterClass Annual Membership and learn how to cultivate fresh herbs and vegetables, keep your house plants alive, and use compost to make your community—and the world—a better place.
