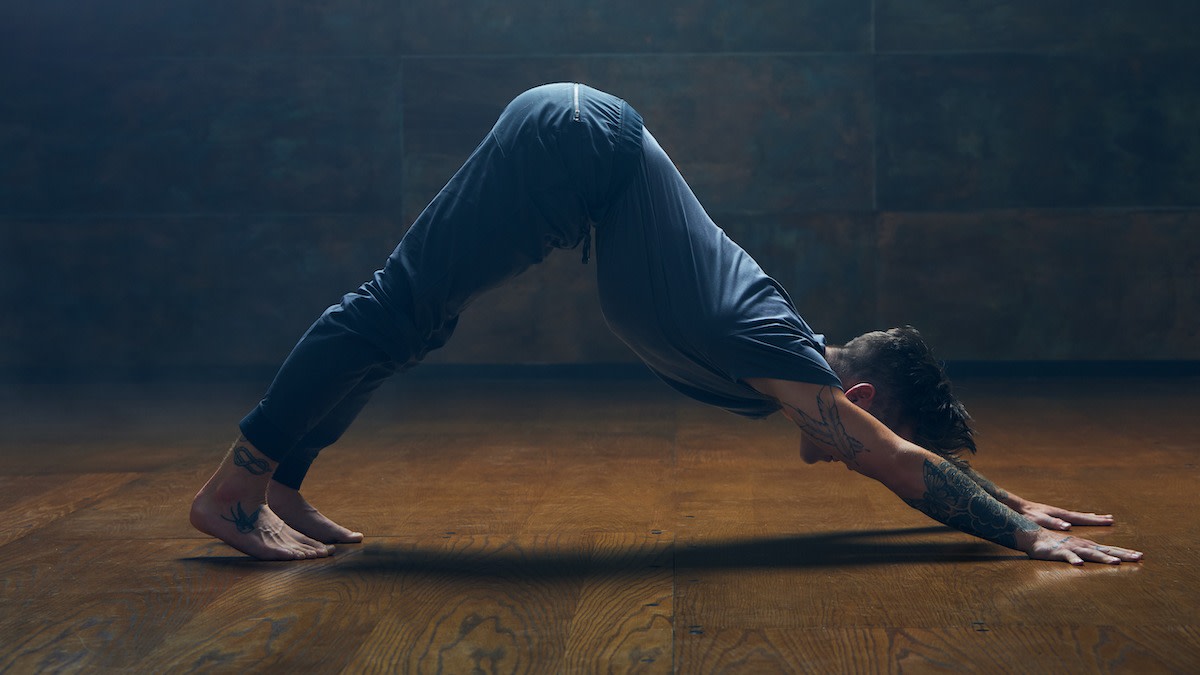
How to Do Downward Dog: 5 Benefits of Downward Dog
Written by MasterClass
Last updated: Jun 7, 2021 • 4 min read
Yoga is a wellness practice that strengthens the mind, body, and spirit. There are many different yoga and postures styles—also known as “asanas”—that beginner yogis can try.
Learn From the Best
What Is Downward Dog?
Downward dog (Adho Mukha Svanasana), sometimes referred to as a downward-facing dog or down dog, is a standing yoga pose where the yogi stretches their whole body on all fours, similar to the way a dog stretches. This yoga pose is often performed during Vinyasa and Ashtanga styles of yoga, either as a transitional or a resting pose.
5 Benefits of Downward Dog
Downward dog pose is a full-body stretch that has many benefits:
- 1. Stretches the lower body. The inversion of downward dog helps you get into position to stretch the hamstrings, calves, and ankles fully.
- 2. Strengthens the upper body. Downward dog is a weight-bearing exercise, so it’s effective at building strength in your shoulders and arms. This yoga pose also engages your midsection to help build strong abdominal muscles.
- 3. Stimulates blood flow. Downward dog is a position that places your heart above your head, allowing gravity to increase blood flow and improve your circulation.
- 4. Improves posture. Downward dog opens up the chest and shoulders, which can help straighten your vertebrae and align your spine, leading to overall improved posture.
- 5. Fine-tunes your foot muscles. This pose stretches and strengthens the major muscles and bones in your body and the smaller muscles in your feet, like the plantar fascia, which is the ligament that connects the heel to the front of the foot. Strengthening this part of your body can improve your walking and help prevent injury to this area when you’re performing more strenuous physical activity.
How to Do Downward Dog
Downward dog is an effective yoga pose that can help relieve chronic pains caused by sitting, tight hamstrings. Here’s a step-by-step guide to performing downward dog:
- 1. Get down on all fours. Start on the floor with your hands shoulder-width apart, with your shoulders above your wrists. Align your inner shoulders with your index fingers. Your hips should be above or slightly before your knees.
- 2. Lift your knees. Next, tuck your toes against the mat or ground, using that leverage to extend your legs and lift both knees into the air. Your body should now resemble an upside-down “V” shape.
- 3. Extend. Extend and lengthen your spine, simultaneously pressing through the palms of your hands and balls of your feet. Pull your pelvis up toward the ceiling, using the triceps in your upper arms to help stabilize your form. Some yoga teachers suggest drawing your shoulder blades down your back, while others prefer externally rotating the joints to support the body instead.
- 4. Hold and release. Hold your body in position, making sure to breathe properly. Slowly bring your knees back to the floor to release this asana, or use it to transition into another pose.
5 Tips for Performing Downward Dog
Downward dog can take a bit of practice, but there are a few simple tips to help make it easier for beginner yogis to perform, such as:
- 1. Make small movements. You don’t have to spring up into position after getting on all fours. Smaller movements may be more accessible for beginners—for example, coming down onto your forearms first like a modified plank before slowly straightening out your legs. You can also use yoga blocks to prop up your hands and make it easier to complete the stretch.
- 2. Change your heel placement. If extending your legs while keeping your back straight is challenging, you can modify your heel placement for relief. Rather than keeping your heels flat on the ground, allow them to rise off of the mat naturally. When you’re ready to deepen the stretch, you can try slowly moving your heels down onto the mat.
- 3. Use a chair. Downward dog can be strenuous on the body if you have limited flexibility. For a modified version, try a forward bend in front of a chair, using the seat to leverage your arms and hold your body at a wide “V” angle. Slowly walk your feet back until you feel the stretch.
- 4. Keep your knees bent. When you extend your legs for this stretch, avoid overextending or locking your knees, which can place unnecessary strain on the joints or lead to injury. Keep your legs as straight as possible while maintaining a slight bend in the knee to ensure adequate stability.
- 5. Avoid tucking your tailbone. Your back should be straight for the entirety of this stretch. Tilt your pelvis forward to keep your spine straight and prevent you from rounding your back.
How to Do Yoga Safely and Avoid Injury
Proper form and technique are essential to ensure the safety and effectiveness of a yoga practice. If you have a previous or pre-existing health condition, consult your physician before practicing yoga. Yoga poses may be modified based on your individual needs.
Ready to Learn More About Yoga?
Unroll your mat, get a MasterClass Annual Membership, and get your om on with Donna Farhi, one of the most celebrated figures in the world of yoga. Follow along as she teaches you the importance of breathing and finding your center as well as how to build a strong foundational practice that will restore your body and mind.
