How to Grow a Chickpea Plant: Care Tips for Chickpea Plants
Written by MasterClass
Last updated: Jun 7, 2021 • 6 min read
Chickpea plants are a fun, unique addition to a cool-weather vegetable garden.

Learn From the Best
What Are Chickpeas?
Chickpeas or garbanzo beans (scientific name Cicer arietinum) are a mid-sized, wrinkled member of the legume (or Fabaceae) family, sometimes referred to as “pulses.” There are two types of chickpeas: the Desi and the Kabuli. Each type is classified according to the shape, size, and color of the bean. Kabuli chickpeas are the most common type to grow in a home vegetable garden. Plant the cool-weather crop just before the last frost date of the growing season.
Chickpeas are one of the oldest known legume crops, cultivated as far back as 8500 BC in Turkey and other parts of the Mediterranean. Chickpeas are now a popular crop globally, prevalent in India, where the Desi chickpea reigns supreme.
What Are the Main Types of Chickpeas?
There are two main types of chickpeas, which are classified by size, color, and shape:
- Desi: The Desi chickpea, also known as the black chickpea or Bengal Gram, is small, round, and various shades of brown, with a yellow interior and rough exterior. Around 90 percent of chickpea consumption occurs in India, which produces most of the world’s supply.
- Kabuli: The Kabuli chickpea, commonly known as the garbanzo bean, is tan, round, and larger than its counterpart, with a smooth coat.
How Do Chickpeas Grow?
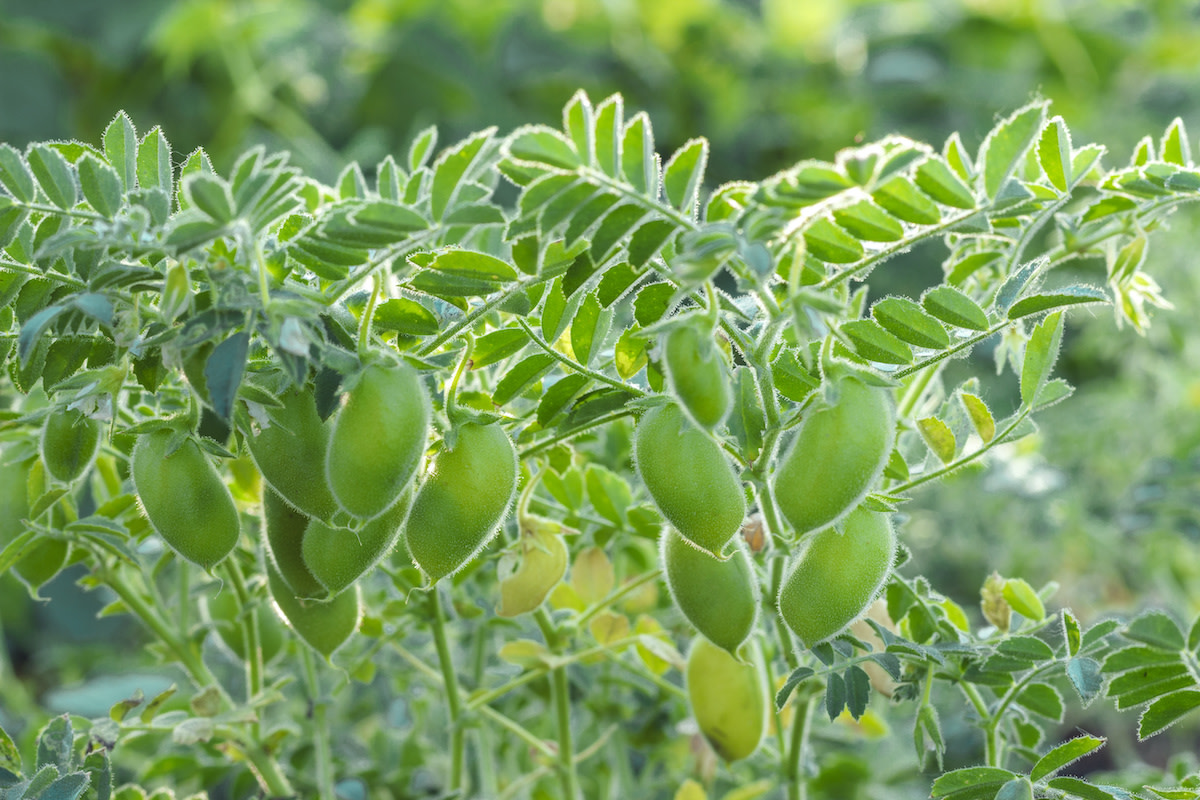
The dry or canned chickpeas that you purchase at the grocery store are the seeds of the chickpea plant. These seeds grow inside green pods (just like snap beans, edamame, or lentils) on bushy plants that thrive in the cool season of early spring.
5 Common Ways to Enjoy Chickpeas
Chickpeas are the key ingredient for many different recipes:
- 1. Crispy chickpeas: Roasted chickpeas are a popular snack, usually oven-baked and tossed in seasoning to make a crispy, flavorful alternative to chips or popcorn. Learn how to make your own crispy chickpeas.
- 2. Hummus: Along with tahini (or a paste made from sesame seeds), chickpeas are the main ingredient of the Middle Eastern spread hummus.
- 3. Falafel: One of the most famous street foods in the Middle East, falafel is a deep-fried ball made from a mixture of ground chickpeas, onions, garlic, and spices.
- 4. Chickpea salad: Since chickpeas are high in protein, they are a common addition to green salads or the foundation of Meditteranean chickpea salad.
- 5. Aquafaba: Aquafaba refers to the liquid leftover from cooking chickpeas (or other legumes). When whipped, chickpea cooking liquid forms foamy, soft peaks, making it a great vegan replacement for egg whites in the kitchen.
How to Plant Chickpeas
Chickpeas are a frost-tolerant cool-weather plant, so the best time to start them is in early spring, a week or so before the last frost date in your area. Once the weather is right:
- 1. Prepare the planting area. Chickpeas grow best in full sun, so choose a spot that gets at least six hours of sunlight per day. The plant thrives in loose soil with good drainage—chickpeas can’t tolerate waterlogged soil. Chickpea plants aren’t fussy about nutrients; soil amended with a bit of natural compost is all they need.
- 2. Inoculate the seeds (optional). If you want to inoculate your chickpeas to improve your yield, mix your chickpea seeds with the inoculant Rhizobium leguminosarum, which is commercially available at many garden stores (look for inoculant specifically labeled for chickpea or garbanzo bean seeds). Allow the seeds to dry in the shade before planting.
- 3. Sow seeds. Plant chickpea seeds in rows, with each hole two inches deep, leaving three to five inches of space between each hole. Space each row roughly 12 inches apart. While this may seem like close spacing, the slight crowding allows the plants to support each other and thrive.
- 4. Water. Water the area lightly after planting to set the soil and keep the soil evenly moist for germination. Avoid watering too deeply as the seeds germinate: too much moisture can crack the seeds.
- 5. Thin. Once your chickpea seedlings are about three inches tall, thin them by pulling up any seedlings growing immediately beside each other, maintaining four to six inches between plants.
4 Tips for Growing Chickpeas
If you’re new to planting chickpeas, here are a few tips to help improve your harvest:
- 1. Companion plant. Chickpeas grow well with most garden plants because they are nitrogen-fixers, meaning they have healthy bacteria-filled nodules on their roots that replenish the soil with necessary nitrogen. Popular companion plants include summer savory and cucumbers. However, avoid planting chickpeas next to alliums (especially garlic) because they release a chemical that inhibits growth in legumes. Avoid planting chickpeas too close to plants susceptible to the same diseases, like potatoes or soybean plants.
- 2. Handle in drier conditions. Chickpea plants can be susceptible to fungus, especially when wet, so avoid handling the leaves or pods after rainfall or morning dew, as this can spread the fungus from plant to plant.
- 3. Be gentle when handling the roots. Chickpea plants have shallow root systems, so avoid disturbing their root systems whenever possible. When weeding, be gentle when pulling up roots near the base of the chickpea plants.
- 4. Try inoculation. Some pulse crop growers add an extra step to their planting routine: inoculating the seeds with a special bacteria that helps encourage nitrogen-fixing, strengthens the plant, and improves the yield. Inoculate your chickpeas by mixing the chickpea seeds with the inoculant Rhizobia cicero, which is commercially available at many garden stores. Allow the seeds to dry in the shade before planting.
How to Care for Chickpeas
Once your chickpea plants are growing, care is straightforward:
- 1. Water: Chickpeas prefer soil slightly on the dry side; too much water will quickly kill the plants. When watering your chickpeas, use a watering can with a long spout that allows you to water the base of the plants directly, rather than using an overhead watering method that will wet the leaves and pods and can increase chances of fungal rot.
- 2. Pest control: Chickpeas can be targets for aphids, leafhoppers, mites, flea beetles, and bean beetles. Pinch individual pests off the plants or remove them with a blast of water—for infestations, use a natural pesticide.
- 3. Monitor for diseases: Chickpea plants are susceptible to fungal or bacterial infections, including ascochyta blight, bean mosaic virus, and anthracnose. Monitor your plants for strange discoloration, dead areas on leaves, or malformed growth. If a plant shows signs of infection, remove the plant to avoid spreading it. Avoid handling the leaves or pods after rainfall or morning dew, as this can spread the fungus from plant to plant.
- 4. Weed gently: If weeds crop up among your chickpea plants, be gentle when removing them—chickpea plants have shallow root systems, so you want to avoid disturbing their root systems.
How to Harvest Chickpeas
Around 100 days after sowing, your chickpeas should be close to harvesting:
- 1. Pull and dry the plants. After 100 days, your chickpea plants will begin to wither and turn brown. Pull up the chickpea plants and lay them out on a mat or in a bin, either in a sunny, dry place outdoors or in a room with good air circulation. As the pods dry, they should naturally split and reveal the chickpeas inside.
- 2. Collect the seeds. After most of the pods have cracked, remove the plants from the mat or bin and collect the dropped seeds. Check the stems for any remaining seeds that haven’t dropped, and use your fingers to crack open the pods and collect the dried chickpeas.
- 3. Store. Store shelled, dry chickpeas in an airtight container in a cool, dry place. Dried chickpeas will last up to a year.
You can also enjoy fresh chickpeas (often called “green chickpeas”) straight off the plant when the pods are still green and immature.
Learn More
Grow your own garden with Ron Finley, the self-described "Gangster Gardener." Get the MasterClass Annual Membership and learn how to cultivate fresh herbs and vegetables, keep your house plants alive, and use compost to make your community—and the world—a better place.