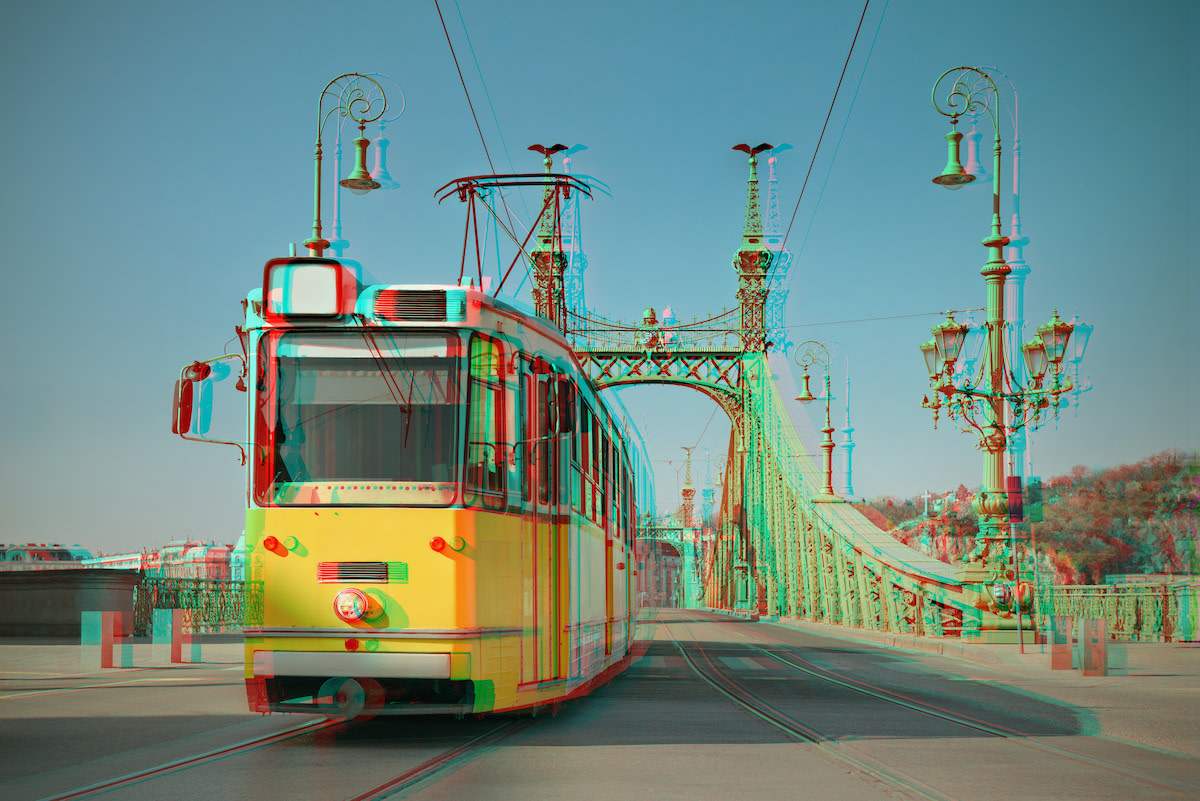
Anaglyph 3D Guide: How to Create Anaglyph Images
Written by MasterClass
Last updated: Sep 27, 2021 • 3 min read
Anaglyph 3D is a stereoscopic photography effect that creates three-dimensional images.
Learn From the Best
What Is Anaglyph 3D?
Anaglyph 3D is a stereoscopic effect made by overlapping two images (a stereo pair) that have been put through a red-cyan filter. Anaglyph 3D images comprise two distinct images: one with a red filter and the second with a cyan filter. Special anaglyph glasses—typically paper glasses with a red lens for the left eye and a blue-green lens for the right eye—control what each eye sees. The brain then integrates the two offset images and approximates the distance between them, creating a three-dimensional effect. The anaglyph format allows 3D movies, video games, comic books, and even NASA’s photos of outer space to come to life.
What Is Stereoscopy?
Stereoscopy is a technique that gives two-dimensional images three-dimensionality by viewing two slightly offset images separately in each eye. When those images are combined, the resulting single image has a sense of depth, which is called a stereoscopic effect. You can view stereoscopic images, also called stereograms, through a binocular device called a stereoscope, that feeds each eye its own image.
An anaglyph 3D effect is a form of stereoscopy that creates two distinct red and blue images to produce a single 3D stereo image. Instead of binoculars, viewers see the effect through a pair of glasses. By using red-blue 3D glasses, you can view the stereoscopic 3D effect in anaglyph images and anaglyph movies.
How to Create 3D Anaglyph Images
You can produce anaglyph images by duplicating a photo, isolating its red and blue color channels, and then combining the filtered layers to create a single image with a 3D effect. Follow this tutorial to give an image a 3D anaglyph effect using Adobe Photoshop:
- 1. Open the image you want to make into an anaglyph in Photoshop. Double click on the background layer and rename it “left.” Then duplicate the layer, by pressing Control-J (or Command-J on a Mac computer), and rename the new layer “right.”
- 2. Isolate the green-blue color channels. Right-click on the “right” layer. Go to “Blending Options.” In “Blending Options” you will see a panel called “Advanced Blending.” Go to the RGB row. "R" stands for the red channel, while "G" stands for the green channel, and "B" stands for the blue channel. Uncheck the "R" channel. Press OK.
- 3. Isolate the red color channel. Right-click on the “left” layer. Go to “Blending Options.” In “Blending Options” you will see a panel called “Advanced Blending.” Go to the RGB row. Uncheck the "G" channel. Press OK.
- 4. Adjust the “left” layer perspective. From the Edit dropdown menu, click “Transform” and then select “Perspective.” Click and drag the top left corner of the “left” layer upward to increase the image by at least 50 pixels.
- 5. Adjust the “right” layer perspective. Now click and drag the top right corner of the “right” layer and increase it by the same amount of pixels.
- 6. Move the left layer. Click on the Move Tool (V) and move the left image to the left by pressing the left arrow on your keyboard 5 to 15 times.
- 7. Move the right layer. Click on the “right” layer. Pressing the right arrow, move the right image 5 to 15 times to the right so that the two layers line up in the middle.
- 8. Crop the final image. Click on the Crop Tool and crop out the colored edges of the image. Now grab your red and blue glasses and take a look at your 3D photo.
Want to Learn More About Photography?
Become a better photographer with the MasterClass Annual Membership. Gain access to exclusive video lessons taught by the world’s best, including Annie Leibovitz, Tyler Mitchell, Jimmy Chin, and more.
